PVC, ideal for most flat and low-slope roofs, is characterized by its ability to withstand harsh environmental factors, such as chemical exposure, fire, and extreme weather conditions, making it an excellent choice for business owners looking to improve the longevity and performance of their building’s roof.
There are three primary ways to install PVC roofing: adhesive, mechanically attaching, and induction welding. Each method has its specific processes and benefits. In this article, we’ll explore these methods in detail and help guide you on which installation method is best for your needs.
Method 1: Adhesively Attaching
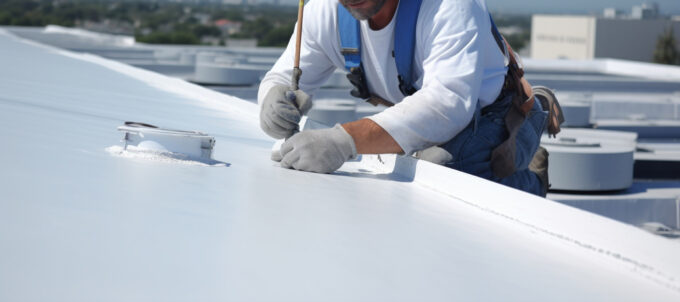
The adhesive installation method helps create a clean, aesthetically pleasing finish without visible fasteners and is particularly advantageous on complex roof layouts where mechanical fasteners might not be feasible. Using adhesive also reduces the number of penetrations in the roof deck, enhancing the roof’s waterproof capabilities.
Tools Needed for This Method
- Utility Knife: For cutting the PVC membrane to size.
- Adhesive Roller: To evenly apply the adhesive on the roofing surface and the membrane.
- Seam Roller: For pressing down the seams to ensure a tight bond.
- Measuring Tape: For precise measurement of the membrane and roof.
- Chalk Line: To mark straight guidelines on the substrate before membrane application.
- Cleaner: For preparing and cleaning the substrate and membrane before application. We recommend isopropyl alcohol, which is effective at removing dirt, grease, and other contaminants without damaging the membrane or substrate.
Installation Steps
- Prepare the Substrate: Ensure the roof deck is clean, dry, and free from debris or sharp objects that could damage the membrane.
- Apply Adhesive: Use the adhesive roller to apply a uniform layer of adhesive to the substrate and on the corresponding underside of the PVC membrane. Be sure to follow the manufacturer’s instructions regarding open time and tackiness.
- Position the Membrane: Carefully roll out the membrane over the adhesive-coated substrate, starting from one end of the roof to the other. Use the chalk line as a guide to keep the application straight.
- Roll the Membrane: After positioning the membrane, use a seam roller to press down firmly over the entire surface, ensuring good contact between the membrane and the adhesive. Pay extra attention to the edges and around any protrusions.
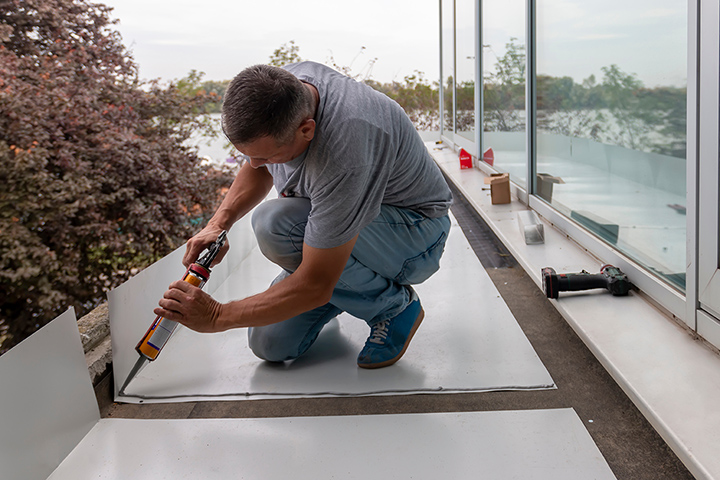
- Seal the Seams: Apply adhesive to the seams where different sheets of membrane overlap. Press the seams together using the seam roller to ensure a watertight bond.
- Inspect & Clean: Once you finish the installation, inspect the roof to ensure there aren’t air bubbles or loose edges. Use a PVC membrane cleaner or acetone to remove any excess adhesive from the surface of the PVC membrane to maintain its reflective properties.
Please note that there are two types of adhesives: solvent-based and water-based. Solvent-based are known for their quick-setting properties, making them great for regions with variable weather conditions, as they can withstand moisture and temperature. However, they require careful handling because they have higher amounts of volatile organic compounds (VOCs). Comparatively, water-based adhesives are easier to handle and have a lower VOC content, but they take longer to cure.
Method 2: Mechanically Attaching
The mechanically attached method involves securing the PVC membrane to the roof deck using screws and plates. It’s a great method when installation jobs need to be quick or if the roofing needs to perform well in high-wind areas. This method is also particularly suitable for large, open roofs where adhesives might be less practical. The visible fasteners used also allow for easier maintenance and inspection.
Tools Needed for This Method
- Screw Gun: For fastening screws through the membrane into the roof deck.
- Seam Probe: To check for gaps in the seams after welding.
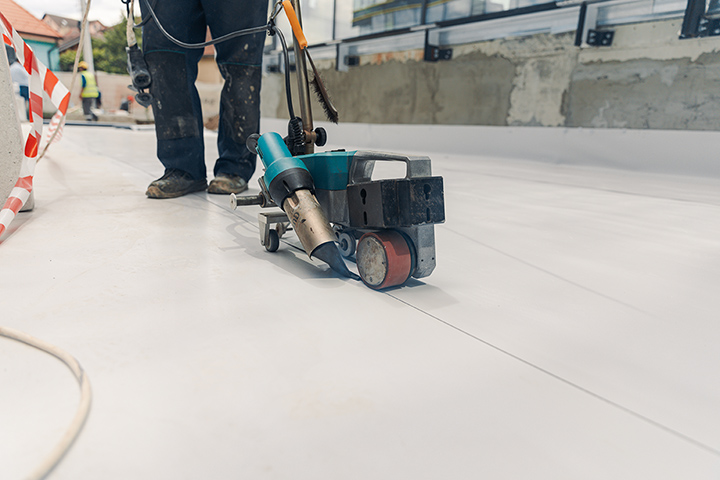
- Automatic Hot Air Welder: For welding seams between membrane sheets.
- Utility Knife: For trimming the membrane to size.
- Tape Measure: To accurately measure the membrane and roof dimensions.
- Chalk Line: To mark placement lines for accurate membrane layout.
- Insulation Boards & Insulation Board Fasteners: Only needed if the roof requires insulation.
- Cleaner: For preparing the roof deck before the installation.
Installation Steps
- Inspect & Prepare the Roof Deck: Ensure the roof deck is clean, dry, and free of debris. Remove any objects that might puncture the membrane.
- Lay Out Insulation Boards (If Applicable): Place insulation boards according to the roof’s thermal requirements. Secure the boards to the deck with fasteners.
- Position the Membrane: Roll the PVC membrane sheets across the roof. Use a chalk line to mark where the mechanical fasteners will be placed to ensure they are in straight lines and appropriately spaced.
- Attach the Membrane: Fasten the membrane to the roof deck using screws and plates. The fasteners should penetrate through the membrane and into the roof deck or the previously laid insulation board.
- Overlap & Weld the Seams: Overlap the edges of the PVC membrane sheets by at least one to two inches. Use an automatic hot air welder to weld the seams together, creating a watertight seal.
- Secure the Perimeter: Pay special attention to the roof perimeter and other high-stress areas. Use additional fasteners or specialized securing systems as needed to reinforce these areas against wind uplift and other stresses.
- Inspect Seams With a Seam Probe: After welding, use a seam probe to check the integrity of the welded seams. Ensure there are no gaps or incomplete welds.
- Final Inspection & Cleaning: Inspect the roof to ensure all parts are securely attached and the seams are properly welded. Clean the roof surface to remove any installation debris or marks.

Method 3: Induction Welding
As the name suggests, this method uses a specialized induction welding tool to heat fasteners placed under the PVC membrane, bonding the membrane to the roof deck without penetrating it. This method provides strong wind uplift resistance and creates a seamless appearance, as there are no visible fasteners.
Tools Needed for This Method
- Induction Welding Machine: Specifically designed to heat induction weld plates under the PVC membrane.
- Magnetic Plates: These plates react to the induction welder and are placed under the membrane.
- Insulation & Cover Board: Only needed if additional insulation is required.
- Membrane Roller: For pressing down the membrane after welding to ensure complete contact with the heated plates.
- Utility Knife: To trim the membrane to the required dimensions.
- Measuring Tape: For precise measurement of the membrane and roof layout.
- Chalk Line: To mark the roof for accurate placement of the induction plates.
- Cleaner: To prepare the roof before installation and clean any residue post-installation.
Installation Steps
- Prepare the Roof Deck: Ensure the roof deck is clean and free from debris. The surface should be dry to guarantee a strong bond.
- Install Insulation & Cover Board (if Applicable): Lay down insulation and cover board across the roof deck. This layout improves thermal performance and provides a smooth surface for the PVC membrane.
- Lay Out the Membrane: Roll the PVC membrane sheets across the roof and align them to ensure proper coverage and overlap for welding.
- Place Magnetic Plates: Position magnetic induction weld plates directly under the overlap areas of the PVC membrane, according to the planned layout marked with a chalk line.
- Induction Welding: Use the induction welding machine to heat the magnetic plates through the membrane. This process bonds the membrane to the plates securely, adhering it to the roof without penetrating the membrane.
- Roll the Seams: After induction welding, immediately roll the seams with a membrane roller to ensure full contact and bond strength between the heated plates and the PVC membrane.
- Inspect & Test the Welds: check the integrity of the welds using the testing method recommended by the membrane manufacturer. Ensure all areas are securely welded with no loose edges.
- Final Inspection & Cleaning: Inspect the roof to ensure all parts are correctly installed and bonded. Then, clean the surface to remove any debris and residue.
Choosing a Method
Each method has its advantages and disadvantages—the installation method you choose will vary based on the following factors:
- Your roof type and the conditions the roof will be exposed to.
- Your technical knowledge.
- Your budget.
- Aesthetic preferences.
Generally, adhesive and induction welded are the two good methods for aesthetics, as neither method requires penetration to the roof deck. The table below highlights additional factors:
| Method |
Adhesive |
Mechanically Attached |
Induction Welded |
| Environmental Conditions/Climate |
Ideal for moderate to warm climates—less effective in extremely cold temperatures where adhesive can become brittle |
Excellent for areas prone to high winds, but may be more prone to leaks in very wet climates |
Good for variable climates, including those with temperature fluctuations |
| Roof Type |
Ideal for complex roof geometries or roofs with a lot of equipment or penetrations |
Ideal for large, open roofs |
Ideal for both complex and simple roof layouts |
| Level of Ease/Complexity |
Technically demanding—weather conditions must also be right |
Simpler and quicker but still labor-intensive |
The hardest of all three methods as it requires specialized equipment and some technical knowledge but overall less labor-intensive |
| Overall Expense |
Varies based on the price of adhesive. Not as costly as induction welded but costlier than mechanically attached |
Least expensive but may lead to higher maintenance costs due to leaks |
Most expensive, but may lead to lower long-term maintenance costs |
| Installation Time |
Lengthy and delays due to weather conditions are possible |
Faster than adhesive methods |
Faster than adhesive methods, but longer setup and preparation time required |
| Potential Risk of Roof Damage |
Low risk |
High risk |
Low risk |
Should You Do It Yourself?
Most likely, no. Even if you have some technical expertise, you shouldn’t install a PVC roof if you don’t have experience with this specific material. Installing PVC roofing requires precision and specific knowledge to ensure long-lasting protection and functionality of the roof.
First, without the proper training and tools, you may struggle with correct membrane placement, seam welding, and adhesive application, leading to weak spots that can cause leaks and roof failure.
Roofing installations also involve working at heights with heavy materials and specialized equipment, posing significant safety risks to untrained people.
Lastly, and most importantly, many PVC roofing materials come with warranties that are only valid if installed by a certified professional. Improper installation can void these warranties, leaving the business owner without recourse in case of material failure.
Schedule an Installation Today
Ensure project success by hiring a professional like Summit Commercial Roofing. Founded over 50 years ago, we specialize in handling commercial flat roofing projects across Southeast Michigan. We can install, repair, and maintain metal, EPDM, and PVC roofing. We’re also certified to install Sika® PVC roofing systems.
Please contact us today to learn more about our capabilities or to request an installation quote.