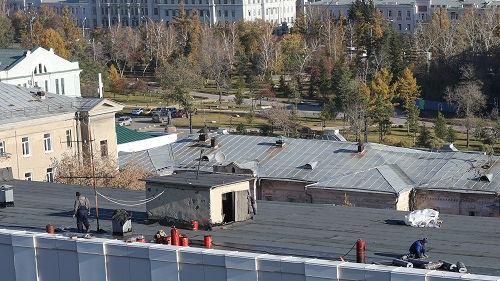
At Summit Commercial Roofing, we love EPDM roofing for its ability to withstand virtually any climatic conditions and its ease of maintenance. However, its installation can be challenging without professional guidance. So, we put together this guide to help you understand what’s involved in an EPDM roofing installation.
Methods of Application
There are three primary ways to install EPDM roofing: mechanical attachment, adhesive application, and ballasted application.
- Adhesively adhered systems involve bonding the membrane directly to the substrate with an adhesive, providing a sleek appearance and superior wind uplift resistance.
- Mechanically attached systems secure the membrane with fasteners, offering a swift and cost-efficient option for expansive, uncomplicated roofs.
- Ballasted systems rely on the weight of stones or pavers to keep the membrane in place, doubling as an economical choice with added insulation benefits.
We generally recommend adhesively adhering EPDM roofing due to its clean aesthetic and long-term durability.
Tools & Materials Needed
Tools
-
Utility Knife
: For cutting EPDM membrane and trimming excess material.
-
Roller
: A hand roller or weighted roller is essential for applying pressure to seams and adhesive, ensuring proper bonding.
-
Seam Roller
: Specifically designed for pressing down seams to create a tight seal.
-
Measuring Tape
: For accurate measurement of the roof and EPDM material.
-
Chalk Line
: To mark straight lines for laying the membrane and aligning seams.
-
Adhesive Applicator
: This can be a paint roller or sprayer, depending on the type of adhesive used, to ensure even application.
-
Caulking Gun
: For applying sealant around edges, penetrations, and seams.
Materials
-
EPDM Membrane
: The rubber roofing material, available in various sizes and thicknesses.
-
Bonding Adhesive
: A special adhesive used to adhere the EPDM membrane to the roof substrate. Ensure it’s compatible with EPDM.
-
Seam Primer
: Used to seal the overlaps between EPDM sheets, ensuring a watertight seal.
-
Seam Tape
: For accurate measurement of the roof and EPDM material.
-
Cover Tape
: For covering and sealing exposed seams and other areas needing waterproofing.
-
Lap Sealant
: A sealant applied to the edges of seam tape and around penetrations for additional protection against water ingress.
-
Flashing
: EPDM or compatible material used around roof penetrations, such as vents and pipes, to prevent leaks.
-
Penetration Covers
: Prefabricated pieces designed to waterproof around protrusions like vents and pipes.
-
Insulation Board (If required)
: Depending on the roofing system design, you may need to install thermal insulation beneath the EPDM membrane.
Additional Supplies
-
Cleaning Solvent
: For cleaning the roof surface and ensuring proper adhesion of the EPDM.
-
Protective Gloves
: To protect your hands during the installation process, especially when handling adhesives and solvents.
-
Safety Equipment
: Depending on the roof’s height and slope, safety harnesses, ropes, and anchors may be necessary to prevent falls.
Installation Steps
At Summit Commercial Roofing, we love EPDM (a synthetic rubber roofing membrane) for its ability to stand up to virtually any climatic conditions and its ease of maintenance. We can show you how to install EPDM roofing in no time, but first, what does EPDM roofing installation drip edge involve?
-
Surface Preparation
The key to knowing how to install EPDM roofing lies in starting with a clean surface. This means removing all dirt, debris, grease, and other contaminants. The surface also needs to be completely dry. Any existing coverings, such as asphalt layers, need to be removed completely.
In the case of commercial roofs with drainage or ponding problems, it’s always best to call a professional for assistance. Installing new EPDM on faulty, incorrectly leveled or damaged roofing won’t improve matters. Experts can replace or re-level the roof surface using high-grade moisture-resistant OSB panels.
-
Pre-Installation Tasks
In order to keep sheets perfectly straight, and minimize the chances of bubbles or creases, the next step is to measure and mark the project area using chalk or a pencil. A roof requires enough EPDM membrane to cover it completely, along with a thick overhang for the adjacent walls and roof edge. During this stage, you’ll also want to install the drip batten and drip back trim at the roof’s edge to direct rainwater over the gutter.
-
EPDM Sheet Preparation
Once you’re ready to begin working with your EPDM rolls, you’ll need to prepare the sheets. EPDM’s versatile nature means that many projects can be handled with a single, seamless layer of up to 50 feet wide. If your commercial roof requires a larger size, we recommend calling our professionals for assistance, since improperly installed seams are one of the biggest causes of leaks and moisture damage.
The membrane needs to be completely unfurled and laid flat over the roof surface. Then the “rest” phase begins, which allows the rubber to expand naturally. On a warm day, resting can take approximately 30 minutes.
-
EPDM Sheet Application
After properly resting, the EPDM sheet is ready for installation. Generally speaking, it’s ideal to work with half a sheet at a time. This is how to install EPDM roofing correctly. Start with the edge facing the wall and work towards the roof’s edge.
If using water-based adhesive, the technique involves spreading adhesive onto the roof — using a paint roller — in sections of three or four feet across the leading edge. While the adhesive is still wet, roll the EPDM forward and then begin the next portion.
Bonded adhesive works differently. It needs to be applied to both the roof surface and the membrane itself. This product allows you to work with larger sections, which need to dry anywhere from 5–20 minutes before extending the membrane.
-
Brushing
Immediately after rolling out the EPDM membrane, it’s essential to brush the surface with a large shop broom. This is designed to eliminate bubbles and provide a stronger bond. Follow the same motion as during installation.
-
Repeating the Procedure
Now that you have half of the membrane applied, it’s time to continue with the next half. Follow the previous installation instructions for EPDM roofing adhesive and brushing, leaving a narrow border at the roof’s edge for the finishing portion.
-
Finishing Touches
While small in size, the final edges take time to get just right. This step involves several individual processes:
-
Applying bonded adhesive to roof and wall edges
-
Sealing roof corners using pressure-sensitive flashing such as Elastoform
-
Creating watertight seals for any equipment with roof penetrations
-
Affixing the drip edge, wall trim and gutter trim using screws
-
Sealing all trim using silicone sealant
-
Removing excess membrane
When executed correctly, these finishing touches leave your roof beautiful and ready to handle any kind of rough weather for decades. For the best results on how to install EPDM roofing that is perfect in every sense, contact our professionals at Summit Commercial Roofing right away.
Common DIY Mistakes
If it seems like there’s a lot involved in an EPDM installation, that’s because there is. That’s why we recommend working with a professional roofing company. A professional can help you avoid common DIY mistakes, including:
- Improper Seam Sealing
- Inadequate Surface Preparation
- Using Incorrect Adhesive
- Using Improper Adhesive Techniques
These mistakes can compromise the roof’s integrity and performance.
Schedule a Professional Installation Today
Ensure quality and longevity by having Summit Commercial Roofing install your EPDM roof. We’re fully licensed and insured and have over 50 years of experience installing commercial roofs throughout Southeast Michigan. Contact us today to schedule your installation. Be sure to ask about our financing options.